From what I can tell most guides online (and even on the Charles website!) are out of date for iOS 17+ / Charles Proxy v4.6.6. I’m half making this post just so I can refer to it next time I have a new emulator I need to setup 🤣
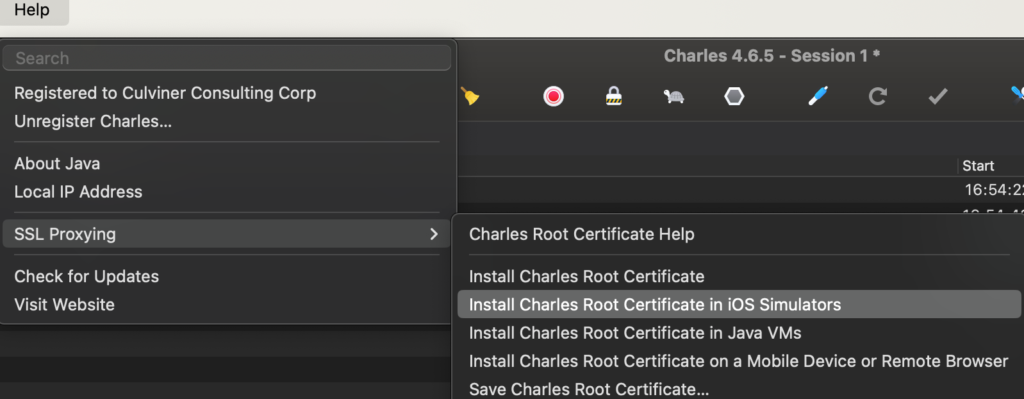
Step 1: Install the Root Certificate in iOS Simulators
Help > SSL Proxing > Install Charles Root Certificate
Step 2: Follow the video / steps below
- Start Charles Proxy
- Open Safari on your Simulator and visit
https://chls.pro/ssl - Click
Allowon the modal - In your simulator
Settings > General > VPN & Device Managementpress the downloaded Charles profile and pressInstalla few times through the warnings (which are good to note, installing a root certificate for a MITM Proxy is scary business!) - Go to
Settings > General > About > Certificate Trust Settings - Press the Toggle for the Root Certificate you just installed in the
ENABLE FULL TRUST FOR ROOT CERTIFICATESsection - Click
Continueon the warning. - Thats it!
Step 3: Enable SSL Proxying for some domains
Make sure you setup SSL Proxying for some domains in Proxy > SSL Proxying Settings
You can enable for *:* like you see below if you want proxying for EVERYTHING but I personally don’t like Charles proxying all my requests on my machine out of security concerns

Step 4: Reboot some stuff
Make sure to reboot Charles and your Simulator before trying to attempting to use the proxy!
Thats it! Hope this was helpful (or helpful for future me)
It still not working?
Check that your certificate isn’t expired
If you’ve been using charles proxy for awhile the certificate will expire after a year. As you install new simulators (for new iOS versions) and install the certificate on them the freshly installed certificate will eventually be expired. See below:
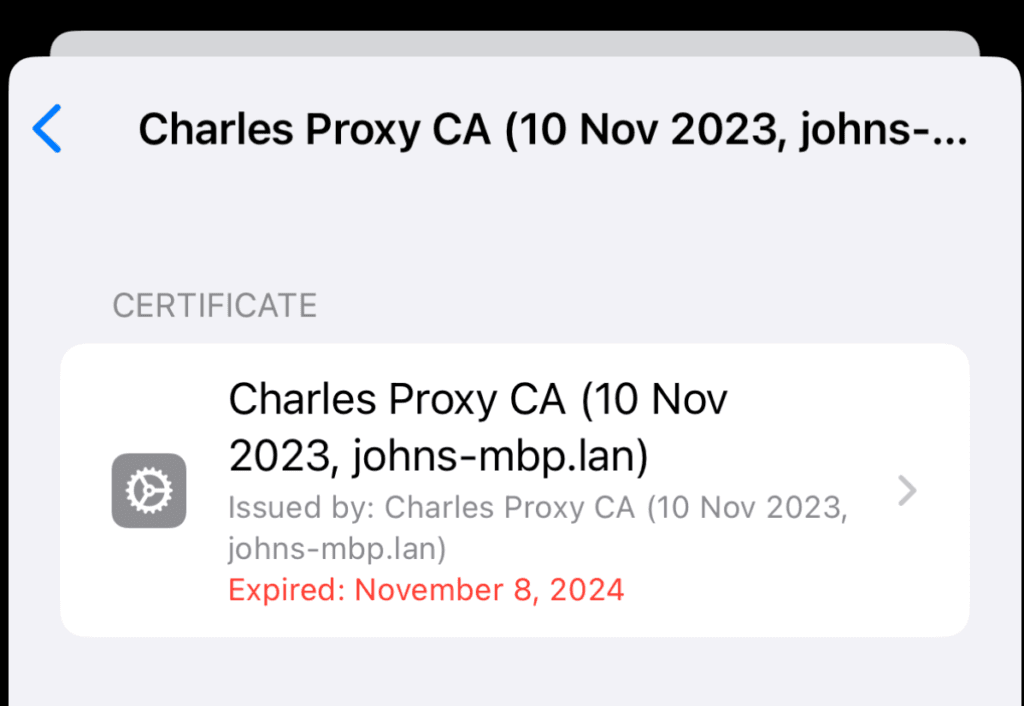
Expired certificate obtained from https://chls.pro/ssl
Fortunately this is easy to fix! Simply reset the Charles Root Certificate in Charles > Help > SSL Proxying > Reset Charles Root Certificate
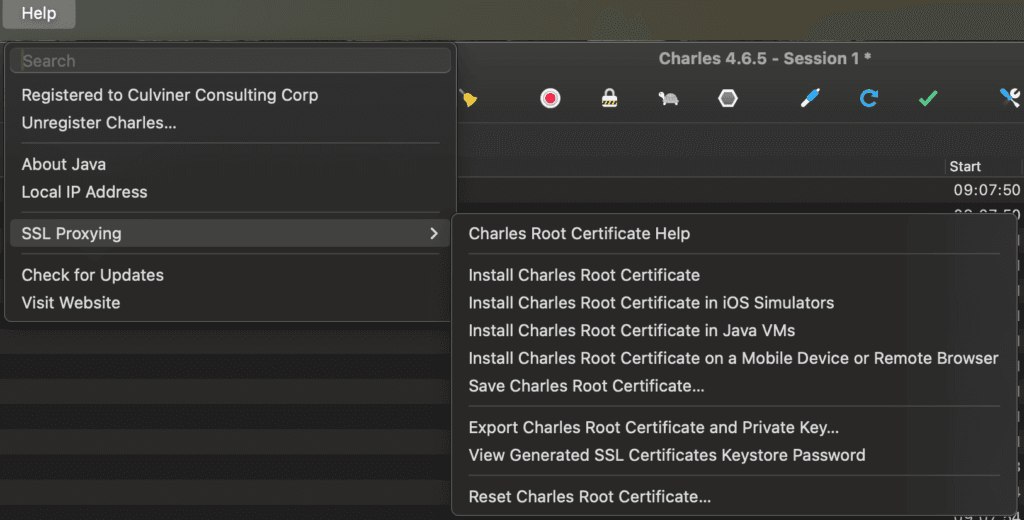
And complete the guide above from the beginning.